

AEM Akamai Cache flush Agent 😍
Introduction
After the first hit to the page in aem and HTML response received for first time from publish instance will get cached on Akamai level.
Subsequent request to the same page will be served from the cached content in Akamai rather than hitting dispatcher / publisher.
Anytime did you struggled to get the latest HTML from publisher instead of Akamai cache?
Well we did!!!
What we have done
We have worked on AEM replication agent for flushing Akamai cache whenever page gets published.
So, after author change a page content and publish it our Akamai cache flush agent configured on publisher environment will pick that page and request to akamai for clearing cache. So that user of that page will get the latest content instead of cached old content from Akamai.
It is all automated, we don’t need to clear the Akamai cache when new product goes live to prod.
We don’t ask DevOps to clear Akamai cache so customers will see latest page. Lets save their 1-2 min(s) time whenever new product launch.
Where you can find the code
What are all details do you need to setup flush agent
- akamaiDomain
- akamaiBaseUrl
- akamaiPurgeUrlPath
- clientToken
- clientAccessToken
- clientSecret
If you think you don’t know these info’s or not sure from where you can get it? Ask devOps these information and say I got your back if you provide me these info 😍
How we are managing the secrets
After getting the above information from you, we are encrypting keys using AEM’s crypto support and storing it on AEM so you are safe with your secrets. While we use it for making the POST call from Transport Handler we will decrypt the keys and use it.
Also while making a POST call to Akamai servers we are using HMAC_SHA_256 to protect the data.
Make sure you are configuring the Akamai cache flush agent on each environment separately
How to configure Akamai flush agent on your AEM author / publish instance
By Assuming you have installed aem design code into your local AEM.
When to setup on author and when to setup on publish
Setup Akamai flush agent on AEM author instance only if you have akamai setup on author level as well. Mostly we will have Akamai setup for publish env.
Always setup Akamai flush agent on publish level so as soon as the page reaches publish instance our Akamai flush agent will go ahead and clear Akamai Cache.
How to setup Akamai flush agent
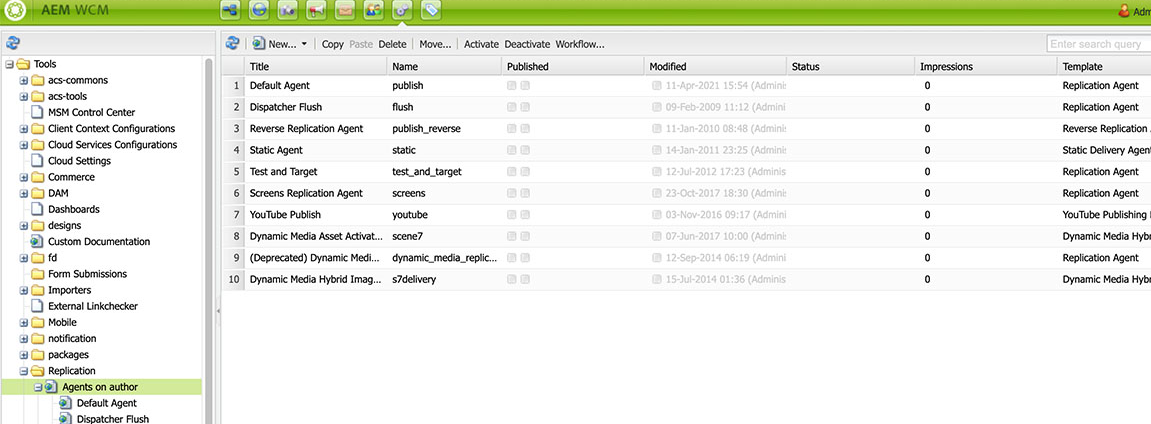
Go to miscadmin and open replication/agents.author for author instance & replication/agents.publish for publish instance
here I’m showing example of setting flush agent in author level same time you can set it in publisher as well.
Click new from tool bar and you will see the Create Page dialog.
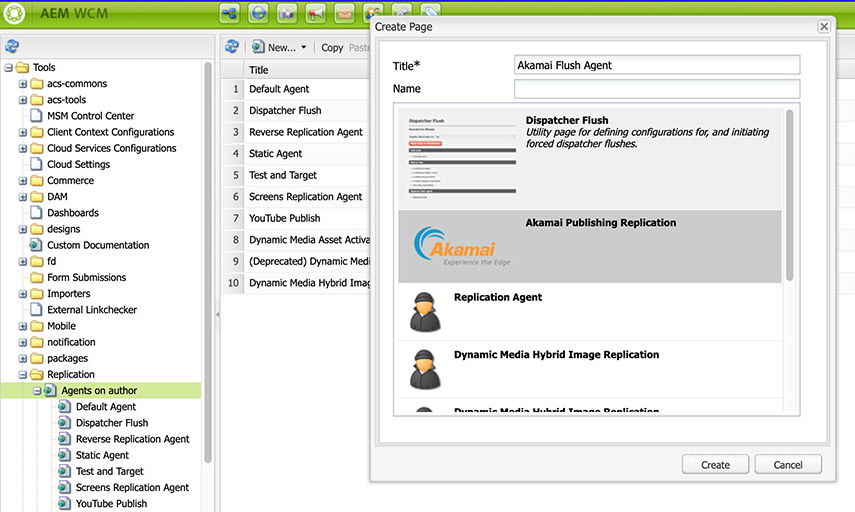
Select “Akamai Publishing Replication” and give your replication agent a name & title. Click on create and open the newly created agent on the list. (it will be the last entry on the list) Click on Edit and provide the information required and click on Ok.


You should be able to see the Akamai Flush Agent is On (green) and it will look for any replication events.
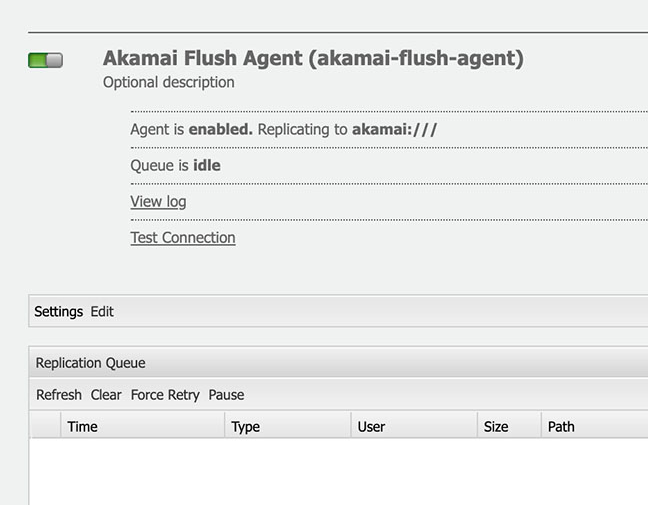
Click on Test Connection link and make sure you have all the correct configurations. You should see “Replication test succeeded”
Conclusion
This component will save our time whenever we need to update the content in AEM pages.
Make sure you have set up the dispatcher flush agent as well so we can avoid content served from Dispatcher cache.
Feel free to reach out to us if you have any questions and don’t forget to tell your friends.
Leave a Comment