

AEM Magento Integration 😍🚀🔭
Introduction
AEM when integrated with an eCommerce provider provides a great experience for online shopping functionalities.
eCommerce functionality is inherent in AEM which shows from demo sites like we retail. As AEM provides very perfect handling of content like authoring and publishing and managing assets, integrating it with eCommerce system provides a perfect way to build a robust eCommerce site.
AEM connects with eCommerce providers, Like SAP Commerce, Salesforce, Magento and more. AEM provides specific eCommerce frameworks to connect to eCommerce providers. In this blog we are going to see how AEM connects to Magento eCommerce. There are two ways to connect to an eCommerce provider Adobe IO or Commerce Integration Framework for a provider. Because AEM provides a Commerce Integration Framework connector to connect to Magento, we will be using that. CIF uses GraphQL queries to talk to Magento and bring data.
Note: To connect to eCommerce providers other than Magento we need to go through Adobe IO. For more info visit. : https://www.adobe.io/apis/experiencecloud/commerce-integration-framework/faq.html
Let’s jump into the steps to implement CIF now.
The commerce integration framework can be found at below locations. Adobe provides production ready components also which can be used.
Build the CIF connector framework or add in your dependencies. Once installed in AEM we can get option to configure the integration properties. Two configurations have to be done. GraphQL client configuration and CIF catalog Magento configuration.
Below are the steps where we have configured these.
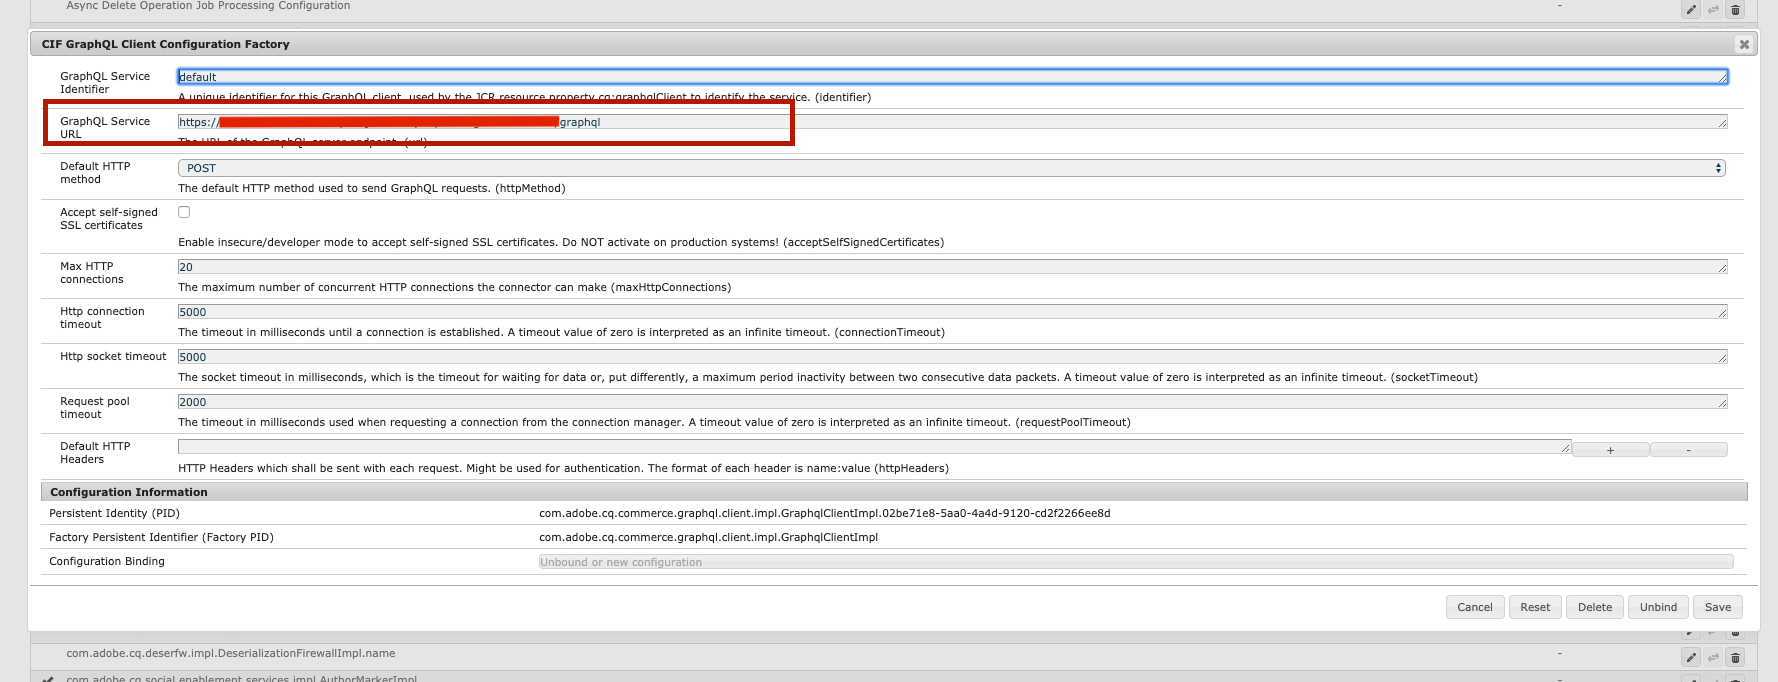
CIF GraphQL Client Configuration Factory
Add GraphQL service – https://magento-hostname/graphql
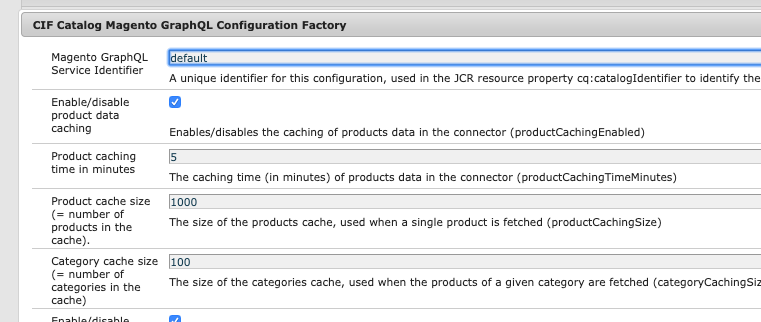
CIF Catalog Magento GraphQL Configuration Factory
Once configured Test the connection in postman, using below query. Results depend on correct products configuration in Magento also.
{
	category(id: 2) {
		id, name, url_path, product_count, children_count, children {
			id, name, url_path, product_count, children_count, children {
				id, name, url_path, product_count, children_count, children {
					id, name, url_path, product_count, children_count, children {
						id, name, url_path, product_count, children_count
					}
				}
			}
		}
	}
}
The response must return results with exact numbers. A sample result is below
{
	"data": {
		"category": {
			"id": 2,
			"name": "Default Category",
			"url_path": null,
			"product_count": 7,
			"children_count": "3",
			"children": [{
				"id": 5,
				"name": "Mens",
				"url_path": "mens-shirts",
				"product_count": 2,
				"children_count": "1",
				"children": [{
					"id": 6,
					"name": "Footwear",
					"url_path": "mens-shirts\/footwear",
					"product_count": 1,
					"children_count": "0",
					"children": []
				}]
			}, {
				"id": 4,
				"name": "SubCategory01",
				"url_path": "subcategory01",
				"product_count": 2,
				"children_count": "0",
				"children": []
			}]
		}
	}
}
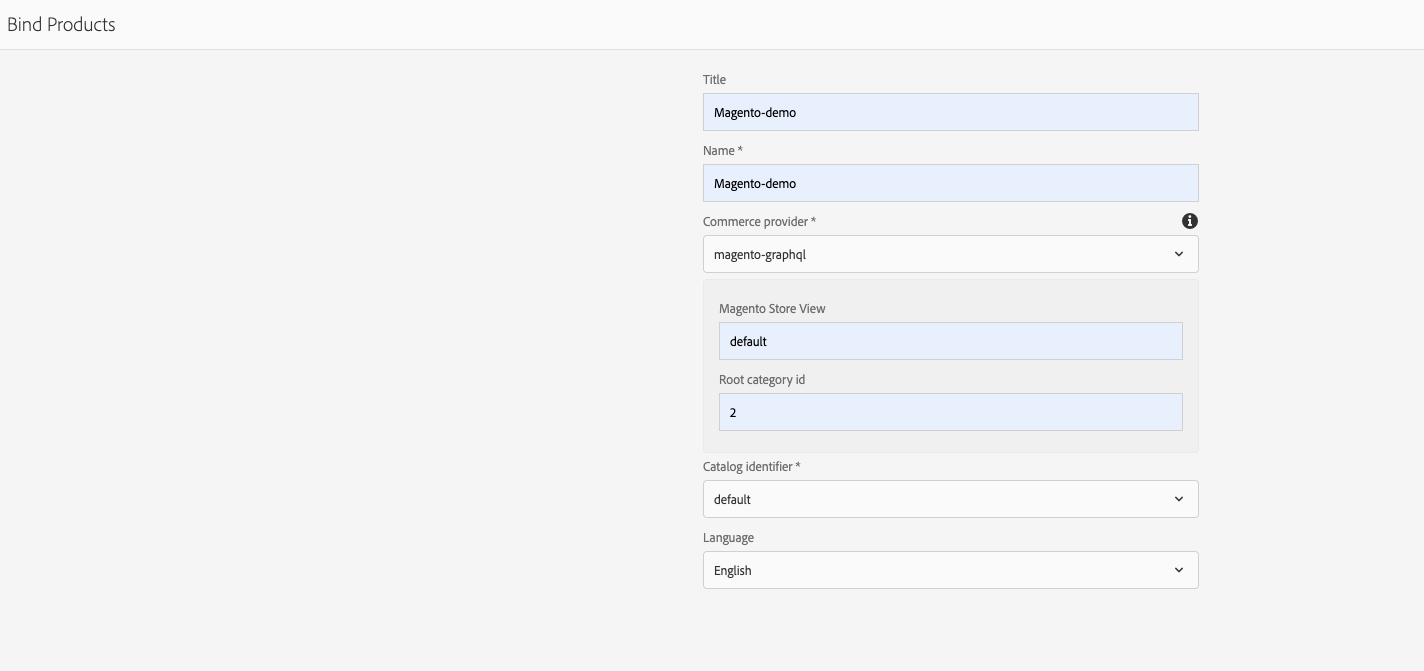
Now it’s time to create binding in AEM Commerce. This will fetch us the products from Magento to use anywhere or in commerce components.
Below image describes the binding configuration.
Once binding is successfully done, results can be seen in AEM ecommerce. The below image shows results in AEM ecommerce after successful binding with Magento.

Thank you.
Leave a Comment